So you have decided to try your hand at making a quilt but do not know much about how to select, prepare, or sew batting, which is the layer of insulation in the middle of the quilt. The varieties available alone may seem endless and overwhelming.
The good news is you are on the right track by conducting some research first. While you may have already discovered there is just a ton of information out there, and often it is based upon the preferences of others, a great starting point for choosing and sewing quilt batting is deciding what suits your project best.
Table of Contents
Step 1: Determining the best batting for your project
Before you explore the batting options available, ask yourself some questions.
What is the purpose of the quilt?
Is it to keep warm and something I will wash many times, or is it decorative to be hung on a wall?
Do I want to highlight my amazing stitches, (use batting that doesn’t shrink as much and has more loft (or “poof”) to show details, such as wool,) or am I new and kind of want to hide those mistakes while starting out, (use batting which shrinks a bit and will give it a slightly more puckered look once it is finished and washed, hiding those “off” stitches, such as a cotton batting)?
How much money do I want to spend?
While some inexpensive battings will virtually disappear after they have been washed a few times, you don’t have to go to the top of the line for a frequently used and laundered quilt you are using for your dog Rover, for example.
I will say, however, that if you are making the time and effort for a quilt that you want to show off or give as a gift, you may want to invest a bit more into the batting to be certain it does not shrink or fall apart when laundered.
What method am I using to sew? How far apart do I want my stitches to be?
The batting packaging should tell you how far apart your stitches need to be. If you are tying the quilt at the intersections of square corners, for example, you can find batting that can be stitched up to 10 inches apart so that the quilt will stay together.
If you have a quilt you want to be sewn more heavily, by machine, you might choose a batting at the other end of the spectrum, with a half inch stitching allowance.
The middle ground, for machine or hand quilting, are battings that allow you to stitch two to four inches apart. Keep in mind that the closer the stitches, the less the quilt will sag after repeated washing and tugging.
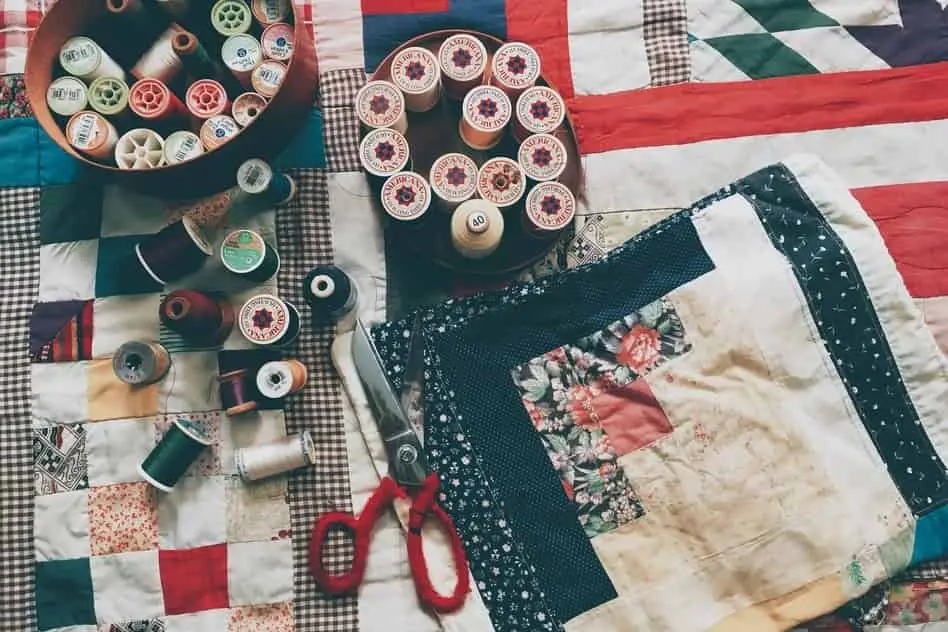
Tip: There are a huge variety of battings available, which are beyond the scope of this article. They range from 100% cotton, 100% polyester, a cotton (80%) and polyester (20%) blend, 100% wool, and natural fibers such as soy, bamboo, and silk and even recycled bottles.
There are a lot of color varieties that often include natural, white, cream and black, as well as a few options based on basting preferences such as bonded, fusible, and needle punch.
Step 2: Preparing the Batting:
If you purchase the batting in advance of wanting to get started on your project and do not want it to shrink after sewing, follow the manufacturer’s instructions on the packaging or website for pre-washing it.
When you take it out of the packaging, it will have lines from being folded or may be wrinkled. If there is no adhesive, you can place it in the dryer with a wet towel on low to no heat.
Alternatively, you can iron it on a setting without steam, and utilize a spray bottle to mist water on top before pressing. (If made of cotton, you can iron directly on the batting but if wool or polyester lay a piece of fabric on top.)
If there is an adhesive on the batting, you will want to avoid heat and moisture, and lay it out 24 to 48 hours in advance on a clean, flat surface such as an unused bed, a tabletop, or on a drop cloth on the floor.
Step 3: Measuring and Cutting
Now that you have prepared your batting, you are ready to lay it out and cut it. To do this, place the batting on the large, clean, flat surface and lay the finished top over it. Cut the batting at least two inches longer on all sides than the top layer of the quilt.
(Note that the backing of the quilt should be two inches longer all the way around than the batting, and the batting should be two inches longer all the way around than the top. This means the top of the quilt will be four inches shorter than the back of the quilt.
If you are sending it out to be sewn by a shop, call them in advance to inquire about their length preferences.
Step 4: Basting
Once again, you are presented with some options. Basting basically means temporarily holding the material in place, and in this case, it means keeping your quilt layers, or quilt sandwich, together so it does not slip out of place when sewn.
If you have fusible batting you can use the wool setting on your iron to baste the layers together. If your batting does not contain adhesive, however, basting can be completed utilizing curved safety pins, basting spray, needle and thread by hand, or by using long basting stitches on your sewing machine.
Tip: Whichever method of basting you choose is a topic in and of itself. I recommend selecting a method and researching additional tips and techniques for that particular method.
Whichever technique you choose, be sure to keep the wrinkles out to make the quilt layers as smooth as possible for easier quilting. In addition, make certain to keep the bottom layer with the printed side facing the floor, the batting in the middle, and the top with the finished side facing out. (It may sound obvious, but you’d be surprised how easy it is to make that mistake!)
Step 5: Sewing Your Quilt Sandwich Together
For machine quilting, you will want to use a walking foot, which keeps layers from becoming uneven or sliding by doing a little hopping motion as it moves, allowing the layers to move through the machine evenly, at the same time.
If you are making a pattern with straight lines, tape can be used to keep your stitching straight, or you can mark the lines with a water erasable fabric pen.
For more advanced sewers, the free motion foot can be used.