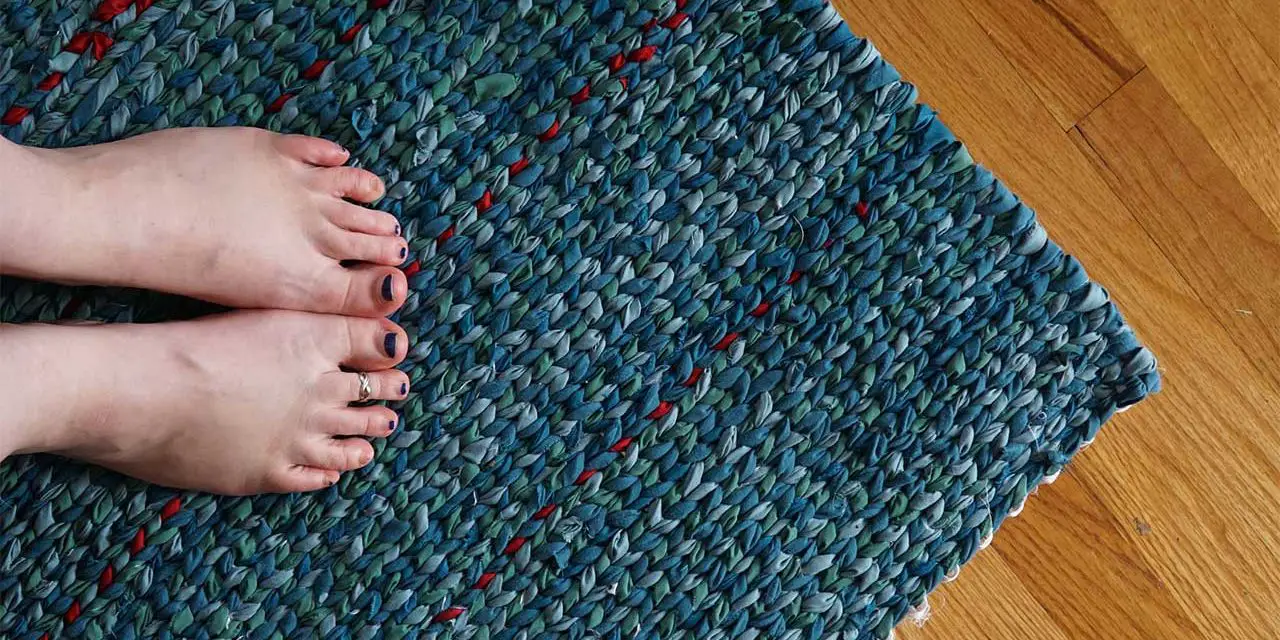
Perhaps you used to make cotton loop potholders. Maybe you still have some holding your plants. They are pretty easy to make as all you have to do is braid under, over, under, over, and so on. Maybe it is time to move to the next step and make something a little bigger like a rug. Braiding a rag rug isn’t that much different to make than potholders and in this article, we will tell you how to make one. It involves no sewing whatsoever so that is a bonus. You just need to have braiding skills. If you used to braid your hair, you will be well prepared to make a rag rug.
Table of Contents
Prepare Your Material
You will probably want the rug to be of different colors to match your room, so you will need to get two separate pieces of fabric. You can buy new material, but if you have large enough scraps of fabric around the house from former projects, why not use them? You could even use clothes you don’t want anymore, but remember to remove any seams. Whatever material you choose you will need to cut the material into strips. Rach strip needs to be one to three inches wide and a few feet long. The length is up to you as you will want the rug to be the right size for your room. The longer you make the strips, the less often do you have to add more strips. If you have too many strips, it will be more complicated to make the rug.
Tie a Knot
The first step is to take a strip of each material and tie them into a loose knot. The reason for having a loose knot is that you will later be pushing more strips through the knot. It will be difficult to do this if the knot is too tight. The strips should be an uneven length as at the end of every strip, you will have to join a new one. The rug will look better if the strips are staggered.
Braiding
To start the braiding process, take the strip on the right-hand side and braid it with the left-hand strip. You will want to go under, over, under, and over. Keep doing this until you get to approximately halfway down the strips. Be careful not to braid too tightly as if you do, the rug may not lay flat.
Turning
When you are halfway down the strips, turn the braids away from you to point in the other direction. Pull the right-hand strip around and tuck it into the edge of the braid. Then braid again, under, over, under, and over so that the material is secure, but not too tight. Then again, tuck the right-hand strip into the main braid and work your way back up to the original knot. When you are turning at the opposite end of the knot, try not to turn too sharply or tightly. This again can cause your rug not to lay flat.
Add More Strips
When you have reached the knot, it’s time to add more strips. Take one of each of the colors and slide them through the original knot. Make sure that you braid in the same way as you did with the first two strips, that is under, over, under, over, and tuck. Don’t worry if you aren’t able to tuck every strip into the original braid. To be able to go around the corner easily, you may have to skip a couple of strips. Each time you add strips, stop halfway down and make a turn and then work your way back up to the knot and tuck the end in.
How to Join Two Strips Together
You may be wondering how to join two strips together as just putting a new strip into the knot won’t work as it could simply slide out. The thing to do is to join the strips is by making a slip knot. Cut a small hole into the ends of the two strips you want to join and then insert the new one into the old strip. Then get the tail end of the new strip and push it through the hole. Tug until it is secure, but not too tight. Do the same for the other two strips and then start braiding in the usual way of under, over, under, and over. Then tuck. Continue doing this until you reach the far end. Make a turn and then come back up towards the knot. Then add two strips again and keep on doing this until you have got the width you want your rug to be. You could be up to eight strips by this time, so now you have to wind the strips down from eight, to six, to four, to two, and finally to none. The last two strips need to be tucked into the knot twice to ensure that the rug doesn’t unravel. And so you have a rug which you haven’t had to sew which will brighten up any room..
Conclusion
It’s not too difficult to make a no-sew rag rug. Once you get the hang of it, you will probably be able to turn one out in an afternoon or even less. You could even make a rug more colorful by using more than two colors of fabric. Perhaps you want to use a fabric with a print. You can do whatever you want. You can make these rugs to match your decor. They are sure to be a talking point with your visitors.


