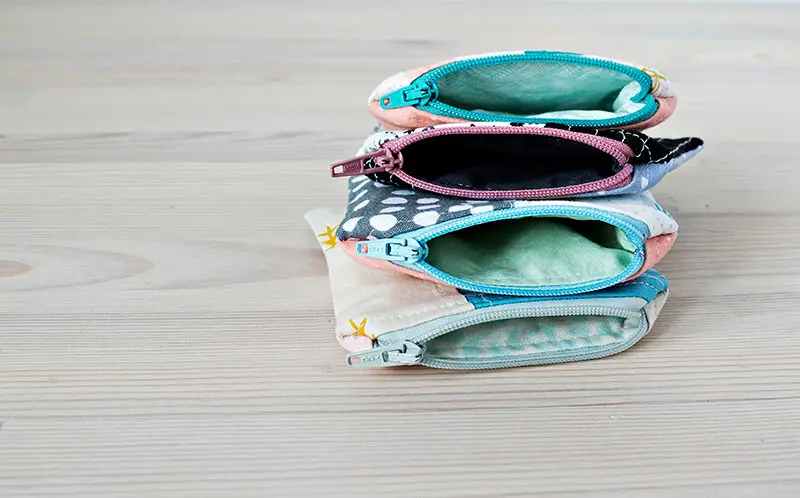
Creating zipper pouches are not only fun but easy to make as well. You can use them to hold your makeup, candy, and just about anything. They are easy to make, cute, and perfect inside any kind of bag. Also, mixing up DIY zipper pouches makes a great gift idea. And If you’ve never sewn with a zipper before, this is the perfect place to start.
Once you have the basics mastered in this easy sew zipper pouch tutorial, you will be able to add flowers and bows. You even create a patchwork zipper pouch. If you have plenty of fabric scraps lying around, you can easily turn those into a zipper pouch. So let’s get started!
Table of Contents
Supplies You Will Need
Fabric
Quilting cotton is one of the easiest to sew. You can buy fat quarters, which are inexpensive so you can easily mix and match fabrics without the need to buy larger pieces. You may also want to search through your scrap baskets and combine smaller pieces to make a patchwork zipper pouch. Or opt for fabrics that coordinate with the outside but make you excited to see what’s hiding within.
Thread
Matching colors will look best. It is also the most forgiving if you’re a beginner sewer.
Zipper
The color and size of the zipper often determine which fabric you will use.
Measure your zipper from its teeth, not the tape. If you have a slightly longer zipper, shorten it. You may use metal zippers but plastic zippers are easier for beginners since their heads are much smaller
You will also need a zipper foot and regular foot.
Zipper Pouch Cutting
Cut 4 rectangular pieces of fabric:
- 2 for the outside
- 2 for the lining
The width should be 1 inch or 2.5cm longer than your zipper. Meanwhile, the height can be any length you want. Also, you can cut any size rectangles you like.
Step-By-Step Guide On How Easy Sew Zipper Pouch
Step 1: Attach The Zipper
Put the zipper right sides together on one of the outside pieces. Make sure the head is down and to the left. Then, put a lining piece on top, right sides together.
Stitch along the top with a zipper foot, getting as close as you possibly can to the zipper.
If you have a bulky zipper that is hard to sew past on one go, you can do this in 2 parts:
- Start with the zipper closed and start sewing 2 inches or 5cm past the zipper head.
- Now go back and open the zipper and sew the top part.
Step 2: Press
- Press your fabric away from the zipper. Be careful not to put your iron on plastic zippers or they’ll melt.
- Topstitch across the seam through both the layers of fabric (lining and outside).
Step 3: Attach Zipper To Other Side
- Attach the zipper to the other side of the pouch.
- Place the lining beneath the right side up.
- Then, put your already sewn piece with the zipper right side up. Add the other outside piece last. This will be right sides together.
- What this does is sandwich the zipper between the lining and the main outside piece.
- Stitch with a zipper foot using the same method as the other side.
Step 4: Topstitching
Press the seam open and topstitch along the zipper.
Step 5: Pin The Outside
- Undo the zipper 3/4 of the way across. This is a crucial step and forgetting to open the zipper will make it hard for you to turn it the right way ou. Also, it will end up unpicking.
- Put the outside pieces right sides together with the lining right sides together.
- Where the zipper joins, put the zipper towards the lining and the seam towards the main outside fabric.
Step 6: Stitch The Seam
Stitch with about a 3/8 inch or 1 cm seam leaving a 2 inches or 5cm gap in the bottom of the lining.
Be careful when sewing over the thicker joins at the ends of the zipper. You may want to hand turn your wheel as it is not worth risking bending or breaking a needle.
Step 7: Clip And Turn
- Clip the corners and the thick zipper ends.
- Turn the zipper pouch the right way out.
- Stitch the gap closed. You can hand stitch with a ladder stitch for an invisible finish or just use your machine. If you use a matching color no one will notice except you.
Step 8: Finish And Press
The final step for this easy sew zipper pouch tutorial is to push the lining back inside the outside fabric. Then, give your DIY zipper pouch a good press.
Easy Sew Zipper Pouch Decoration Ideas
If you want to make your zipper pouch unique and stylish, here are some decoration ideas to consider:
- Wrist Strap. Adding a wrist wrap to your zipper pouch can easily elevate its design. Likewise, it lets you go hands-free whenever you’re out and about. If your zipper head is small, use a small ring to join the wrist strap through the hole
- Fabric Bow. You can easily DIY this to make your pouch even cuter.
- Tassel. You can also decorate your zipper pouch with a fun and vibrant colored tassel. For a bit more sophisticated look, leather tassels will do the trick. You can use real leather or faux leather to suit your tastes and budget.
- Yo-Yo Flowers. These classic flowers are made from a circle of fabric which are then gathered.
- Sewing Ric-Rac. This is an inexpensive yet cheerful decorative idea.
- Embroidery. Embroidery is an easy and relaxing habit to do. People usually call this a TV job. Just turn on your TV and do your embroidery while watching your favorite series. You can create embroidered flowers, letters, leaves, ribbons, and a whole lot more!
I hope you find this easy sew zipper pouch tutorial an enjoyable one. Making zipper pouches are quite easy and you’ll have so much doing it. And if you’re having a hard time thinking of a gift to give for a baby shower or birthday, your friend will not love it but appreciate all the effort you put into sewing it yourself.


