There’s something about these colorful balls of fur that people can’t get enough of. Heck, art enthusiasts and folks who knit love using pom poms to add an extra pop of color and spark to their creative projects. Plus, it’s also a neat way to enhance fine motor skills.
But what do you do when you’re new to sewing? Fret not, learning how to sew a pom pom isn’t very difficult. In fact, there are multiple ways to get the task done.
Table of Contents
How to Sew on a Pom Pom
Before we get down to the details, you’ll have to make yourself a pom pom first. Here’s how you can make yourself.
How to Make a Pom Pom
If you really are interested in the world of arts and crafts, you will definitely benefit from learning how to make a pom pom by yourself. Rest assured, the task is fairly simple and only requires some yarn and your fingers! Follow these steps to make your own colorful ball of happiness.
Step 1
Choose the color of your yarn. Take one end of the yarn and snip a 10″-24″ length, and then set this aside. Begin wrapping this yarn from the ball around the fingers. Note that three or four fingers make a standard, adult-sized pom pom often for a hat; that being said, you could make a couple of them and decide what size you want.
Make sure you wrap it plenty of times. Also, wrap the yarn more times than you think you have to. This is because you want the pom pom to be very nice and full.
Step 2
Once the pom pom is as full as you want it, pull it off the fingers and hold it firm to make sure you do not lose any loops.
Step 3
Take the yarn that you cut previously, and then tie it firmly around the middle. Keep in mind that you may need some help while you tie your knot, as it is very important that it’s tied as tightly as possible. Remember that if the knot is loose even slightly, the pom-pom can easily come apart.
Step 4
Cut all the loops once the knot is tied. Your yarn will settle into a haggard and overgrown pom pom shape.
Step 5
Now it is time to finish the pom pom by giving it a good, round haircut. Make sure you do not get too carried away! It is easy to lose sight and cut one side too short. Keep in mind that this part often takes practice, but once you make two or three, you get used to it. Also, make sure that you leave 2 ends long for tying.
Sewing a Pom Pom
This method is designed to help you sew a pom pom on a hat. In this case, your pom pom should have two strings attached to it. You will need a yarn needle to get started:
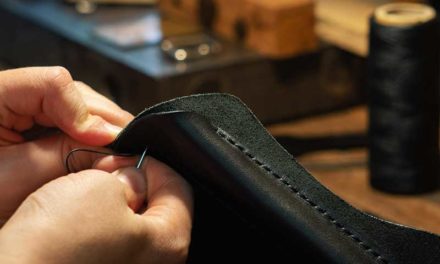
- Attach the yarn needle to one of the loose (string) ends of the pom pom and then push the needle up the through the hat. Here, focus on the gathering and then push the needle out of the hat.
- Now pass your needle right up the bottom of the pom pom, straight through the middle.
- Pass the needle down through the pom pom, down the hat. Your goal is to work on circular sewing patterns on the top of the hat. Remember to only work up and down over the middle of the pom pom.
- Once you have made around 6 or 7 stitches around the top of the hat to form a circle, pull the ends of the yarn, pushing it through the inside of the hat to form a sturdy knot.
How to Sew on a Pom Pom with a Button
We weren’t kidding when we said that there are multiple ways to sew on pom poms. Here’s how you can do so with a button:
- Thread a piece of yarn through a button, you’ll be better off with a larger button since it will help stabilize the pom pom.
- Now tie the string into a knot so that it remains secure. This will prevent the pom pom from falling.
- Ensure the pom pom is secured tightly and then trim the extra threads while tucking in any stray strings.
Pom Pom Ideas
Now that you’ve learned how make and attach pom poms, here are some ways to use these little fur balls:
- Decorate your outdoor trees
- Attach them to your scarves or beanies
- Make great Christmas theme decorations
- Make a nice pom pom mat
- Make a nice critter by carefully attaching googly eyes
- Decorate your gifts
- String them together in order to make a garland and decorate your bedroom
- Make cute earrings
- Decorate shoes
- Amazing pom poms backpack hangers
- Hang them from any branch for a nice wall hanging
- Get a little crazy and make a beautiful pom pom chandelier
- Use embroidery hoops with colorful pom poms in order to make a unique and nice mobile for a nursery.
- Pom poms whether large or small add color, interest as well as texture to plain cushions.
Conclusion
Hopefully, this detailed guide has provided you with clear instructions on how to sew on pom poms. Let us know which way was your favorite!


