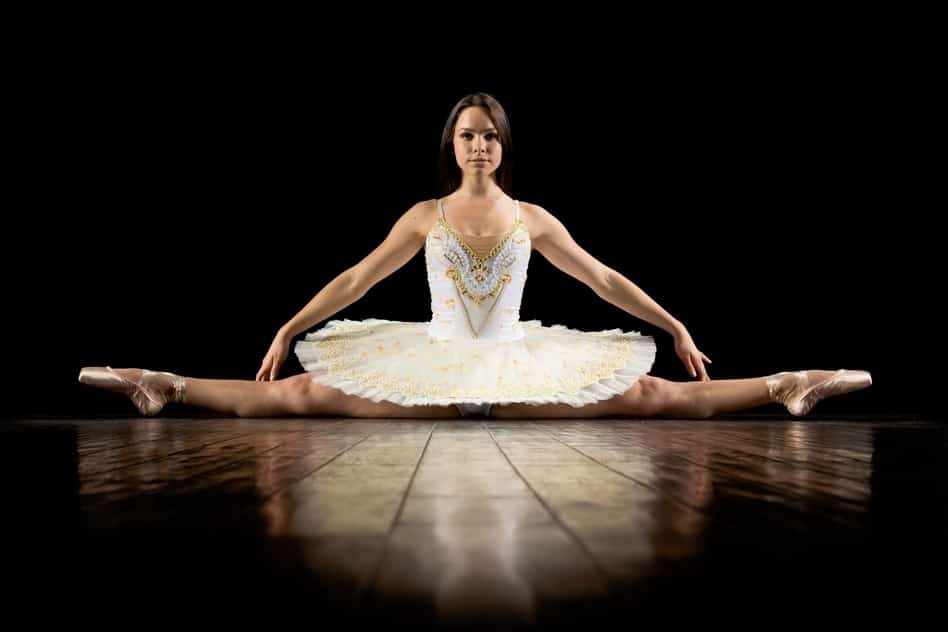
You’ve probably seen ballerinas dancing on their toes and wondered, “How on Earth are they doing that?” Well, pointe shoes allow ballerinas to dance and balance on their toes. And if you’re a ballerina yourself and you’ve picked up a new pair, you’re ready to break them in and slip them on for your next show.
Keep reading to learn how to sew them up and make them yours.
Table of Contents
The Point of Pointe Shoes
By the early 20th century, prima ballerina assoluta Anna Pavlova designed and wore special pointe shoes for all dancing. Her satin slippers were attached with elastic and ribbons, had hard leather soles for additional support, as well as a hardened, flat toe area, reinforced to form a box.
The modern pointe shoe consists of similar parts: a box at the front of the shoe that supports and encases her toes; a rigid shank to provide stiffened support for the arch of the foot; and a fabric exterior, usually made of satin.
Two ribbons and an elastic band on each shoe allow the dancer to fasten them. (It wouldn’t do at all for one shoe to fly across the stage into the audience during a series of fast fouettés.)
A Rite of Passage
A dancer’s first pair of real pointe shoes are a rite of passage, a sign that she has moved to adulthood in the world of dance. However, that first pair is usually not her last. Pointe shoes take time and care to break in.
The breaking-in process over time weakens the shoe to the point that it is worn out. If a dance student doesn’t outgrow her shoes, she will wear them out in a matter of weeks or months, depending on how hard she works.
Professional dance companies such as the New York City Ballet can go through about 8500 pairs of shoes in a year for 180 dancers. Once the outer fabric has worn through to expose the box, the shoes are not fit to wear.
Preparing Your Pointe Shoes
The ribbons and the elastic band must be sewn onto each shoe for each dancer individually, as each dancer fastens them using the technique that works the best for her and her feet. After she puts her shoe on her foot, she overlaps the ribbons to form a crisscross in the front.
The ends are tied together in a knot, and then the knot is tucked under the ribbon on the inside of the ankle to hide the aesthetics. Some dancers burn the ends of the knot to keep it from fraying.
The elastic band is meant to hold the heel of the shoe in the proper position when the dancer is en pointe. Some dancers even use more than one elastic to keep their shoes in place…better safe than sorry!
Sewing the Ribbons
Before the dancer is dancing en pointe, the school may require her to sew on ribbons onto her pointe shoes as an exam. (If the school requires her to learn in demi-pointe or trainer shoes, she will still need to learn how to sew the ribbons eventually.)
She will find the best method and placement for the thousands of shoes she will wear throughout her dance career. Each individual dancer, from the lowliest student en pointe to the stellar heights of Dame Margot Fonteyn, Suzanne Farrell, or Misty Copeland, performs this ritual for themselves.
Step 1: Marking the Position
Fold the heel of the shoe down to meet the inside sock liner, and mark the inside of the shoe with a pencil.
This line will ensure that the back edge of the ribbon is angled in the correct place. (If you need to use a good art gum eraser to measure and draw twice, do it. It is better to take time to mark the position correctly rather than have ribbons that do not fit your feet.)
Step 2: Placing the Ribbons
Pointe shoe ribbons are usually made of nylon or polyester satin, either shiny or matte, depending on the shoe fabric. The ribbon is 7/8” to 1” wide, and usually matches the shoe or is dyed to match.
Turn the back edge of the ribbon under so it makes a nicely-folded hem. Then pin the back edge of the ribbon using a strong straight pin at the pencil line, so the ribbon is aligned correctly with the penciled line you made.
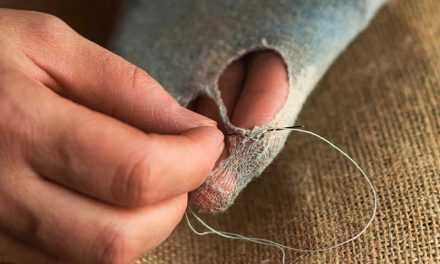
Step 3: Sewing the Ribbon
Using strong thread or dental floss, sew the ribbon securely to the inside of the shoe. (Hint: If you can’t find a polyester thread the same color as your shoes, use DMC Perle Cotton Thread Size 12 in a color match.
The wardrobe mistress will probably have some or know where to order it.) It is best to use tiny running stitches across the width of the ribbon in two close parallel lines.
If the shoe lining is in a separate piece from the shoe, the stitches will not show through the fabric cover, but if the shoe lining is bonded to the outside of the shoe, you will be glad you took extra time to match colors.
Step 4: Sewing the Elastic
Pointe shoe elastic is designed to keep the shoes from slipping off the heels, and it is wider and more heavy-duty at about ½ to ¾ inch wide.
Use a piece of elastic about 5 inches long, and mark and sew the place for the elastic on one side of the shoe just as you did for the ribbon, then repeat the process on the other side on the shoe.
The ribbons will then hide the elastic when you are dancing in class, rehearsal, or in performance.
Step 5: Repeat the Entire Process
Most people have two shoes, and each foot may fit differently than the other.
Sewing pointe shoes is simple and straightforward, enabling you to customize your shoes to fit for comfort.
Since you’ll be dancing in them for hours, it’s important that they are designed specifically for you to prevent injuries. Now go on, get out there and enjoy the dance!