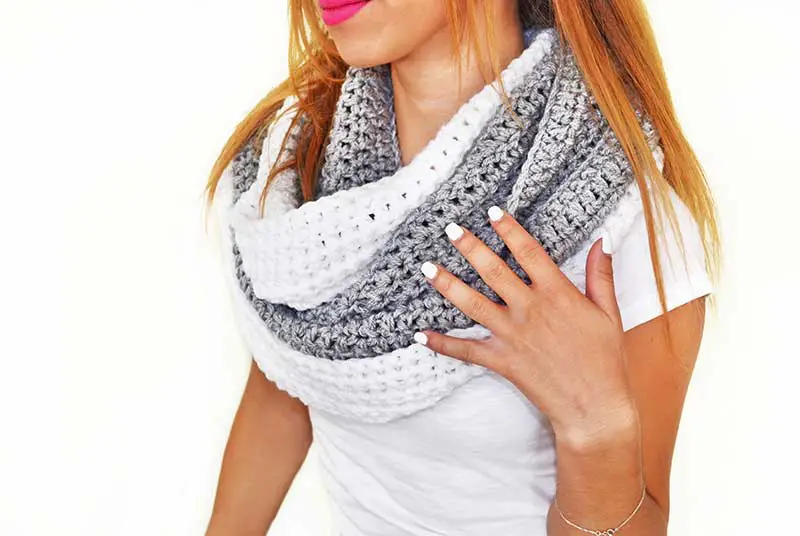
What is an infinity scarf? It’s not just a length of material as many scarves are, but it’s a circle of fabric that is worn as a scarf. It can be worn in all sorts of fashions, for example, a long loop, a double loop, or a loop with a knot. Infinity scarves can be made out of all sorts of material such as jersey, fleece, cotton, or linen. You will find that jersey hangs well although it can be a little slippery to work with. Infinity scarves are versatile and can make a dress look special for an evening out. Depending on what type of material you use, they can be worn with casual wear and for keeping warm, as well as for special occasions.
It isn’t too hard to make an infinity scarf. You can choose to just make one out of a single piece of material, but you could make one out of two contrasting pieces of fabric. Choose different colors or prints that match. If you feel like it, add more pieces of fabric for a multicolored look. The great thing about infinity scarves is that they don’t have visible seams and it is easy to hide raw edges. In this article, we will tell you how to make an infinity scarf. It can easily be made in less than half an hour.
Table of Contents
What You Will Need
If you are making an infinity scarf using two pieces of fabric, you will need two pieces measuring 14 x 60 inches. If you are just making the scarf from one piece of material, you will need a piece measuring 28 x 60 inches. All you will have to do with one piece is to fold and sew. It’s a little more complicated if you use two pieces.
You can sew the scarf by hand, but it’s quicker to use a machine. You will also need a needle and thread, sewing pins, a ruler, and a pair of scissors or rotary cutter. A rotary cutter is quicker and is precise, but be careful with your table as it is sharp. It’s best to have a cutting mat if you are going to use a rotary cutter.
Fold, Pin and Cut the Fabric
Before you start, it is a good idea to wash, dry, and press the fabric. This is because the material might shrink. In addition, washing helps to get rid of excess dye.
You will be working with a large piece of material, so it is a good idea to fold the fabric in half before cutting it. This means that you will be cutting a piece of fabric measuring 28” x 30|. If you are using two different fabrics, you will have to cut two pieces measuring 14” x 30” each.
The next step is to pin the fabric where you want to cut it. Pinning keeps both layers together. It is a little more difficult to pin jersey, so if you are using this fabric, pin lines just outside where you want to cut. Jersey is a slippery fabric which makes it harder to pin and cut with accuracy.
When it comes to cutting the fabric, the best tool to use is a rotary cutter because it is more precise and quicker to use than a pair of scissors. Keep a ruler handy so that you get the exact measurements. If you are using two pieces of fabric, cut one out and then use it as a guide for the second piece. This is a great timesaver.
Sew the Scarf
If you are using two pieces of material, now is the time to pin them together, right sides facing. With a ¼ inch seam, sew down the long edges. A straight stitch is best unless you are sewing jersey when a zig-zag stitch is better. It doesn’t matter too much if the edges aren’t completely perfect because the scarf is a loop and you won’t see imperfect seams.
Once you have done this, trim the seam allowances to ⅛ inch. Then, use a ruler to make sure that the short ends of the scarf are straight.
Keeping the scarf the wrong side out, put a hand into one short end and pull the other short end through so that it touches the end you pulled it through. You should then have four ends all lying together. The outside will still be the wrong way out, while the right side will be inside.
You will now have to pin together the bottom two layers and then the top two, making sure that the side seams line up. You will be left with an open tube. Leave about three inches without pins as you will need to pull the fabric through a hole to turn it right side out. However, you can pin the beginning and end of this area with vertical pins so that you know when to stop sewing.
Then you need to sew the ends so that the scarf is a loop/ It is useful if you can sew in the round, but that will only be possible if your sewing machine has a free arm that can be removed. If you haven’t, lie the fabric ends down and sew through one layer at a time. You should use a ¼ inch seam allowance. Start at one end with a vertical pin and end at the other. It is a good idea to backstitch at the beginning and end as this will keep the thread secure.
Finishing Touches
The final thing to do when you have finished sewing is to turn the scarf the right way around through the hole. Stitch up the hole. You can use your sewing machine to do this, but the stitches might be seen. What is better is to hand sew with a slip stitch.
Conclusion
As has been seen, it’s not too difficult to sew an infinity scarf. Once you’ve got the hang of it, you can make many infinity scarves in different colors to match all your outfits.


