Leather is best sewn by hand as it is a tough material and should only be sewn on a sewing machine if it is an industrial machine. The best stitch used for hand sewing leather is the saddle stitch as it is secure and strong. In this article, we will be taking a look at sewing leather by hand which will hopefully lead you in the right direction to either make new items or repair a leathkkkier product.
Table of Contents
Tools Needed to Sew Leather
- Two sewing needles
- Waxed thread
- Sewing awl, ice pick, or a hammer and nails
- Binder clips or small clamps
- Fork
Step 1; Prepare the Leather for Sewing
It can be difficult to keep two pieces of leather together as they have a tendency to slip. To solve this problem, use border clips or adhesive to keep the material together. This is especially useful if you are repairing something like a boat sail that has to be fixed where it is.
Match the ends of the leather pieces and use the clips or adhesive to hold them together. This will make it easier to align the holes for stitching. You will want them to be in a straight line.
Step 2: Set the Spacing for the Holes
You need to have even spacing between the holes so to do this use a fork to mark the leather. You will need to overlap the last impression each time to ensure a straight line. Because of this, you will make three marks every time, not four.
Step 3: Make the Holes
The best tool to use to make the holes is a sewing awl, but you can use an ice pick. An ice pick, however, is not as good as it can tear the leather. Sewing awls make neat holes, meaning that the item of leather will last longer.
Another option is to use a hammer and nails. Secure the two ends of the leather pieces by putting them on a piece of wood. Hammer in nails at each end to hold the leather in place. You can use the fork method for creating impressions on the leather. Then hammer a nail into each impression to make the holes.
You need to pierce right through both pieces of leather, whichever method you use. If your leather is particularly thick, you may need to puncture both sides of the holes. You will have to push through one hole enough so that you can see where the hole would be.
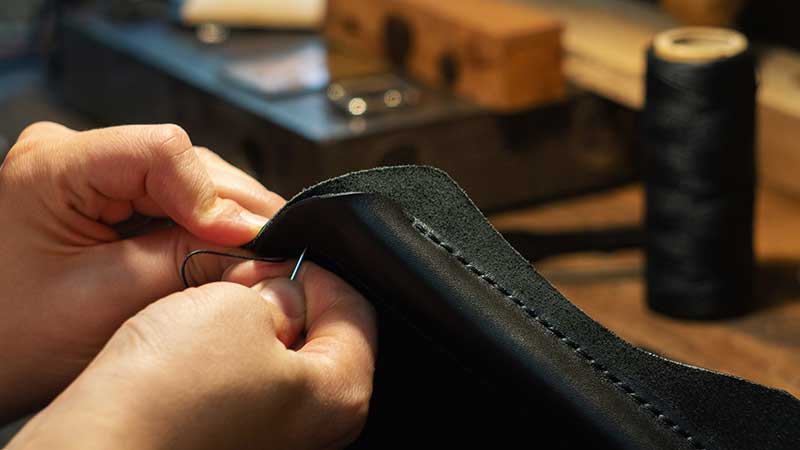
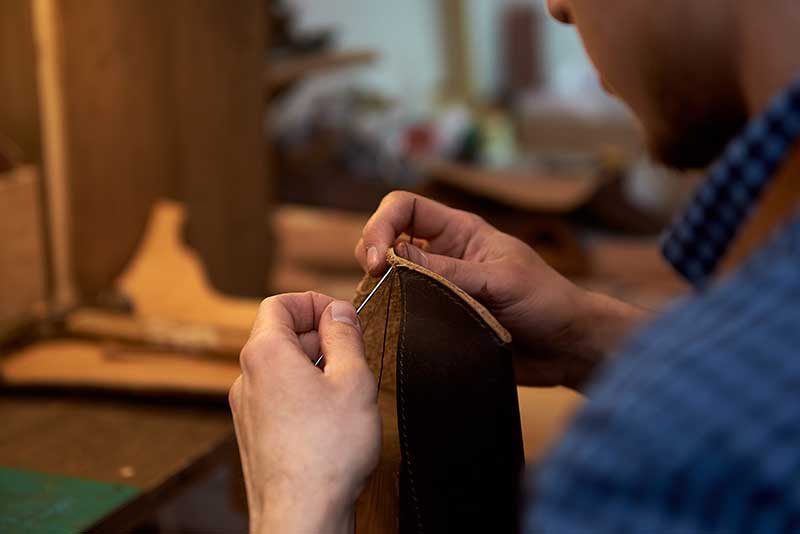
Step 4: Sewing the Leather
Once you have created all the holes, it is time to start sewing the pieces of leather together. You will be using the saddle stitch which is strong and sturdy. Cut thread at least three and a half times the length of your leather. The thread will need to be waxed. If you can’t get hold of waxed thread, you can make it yourself with candle wax or beeswax. To do this, hold the thread through your thumb and pull it a few times. This helps the thread to take the wax. The reason for waxing the thread is that it makes it stronger. This in turn will allow the item to last for longer. The stitches won’t loosen as they could do with ordinary thread.
The next step is to put a needle on each end of the thread as you will be sewing from both ends. Push a needle through the first hole on each end. Check that you have used the same amount of thread and that each needle is an equal distance from the ends.
The needles should go through pretty easily, but if you have problems use pliers to tug the needles through. If you have to use pliers, make sure that you’re not pulling through at an angle. You need the needle to be straight otherwise it could break.
The next step is to start sewing figure eights back and forth through the holes. With each needle go through the second holes. Make sure that you are going through both pieces of leather.
The holes should be lined up, but you may need to adjust them slightly if the leather doesn’t look straight. You will have to find the right angle to go through the holes.
If you have a problem with pulling the thread again through one hole, pull it to one side so that you can get the thread through again. Continue doing this down the pieces of leather, making sure that the thread is tightly secured.
When you come to the last holes on both sides, you will need to secure them so that they don’t come apart. If you’ve had problems getting the needles through the holes, you might want to widen the last holes with your sewing awl. Go through the final holes with the figure of eight patterns. Once you reach the end, double back through two sets of holes. This will probably be slightly difficult so you may have to widen your holes a little. You don’t want to widen them too much as that would make the item less secure and more prone to falling apart.
Once you have stitched back twice at each end, tightly pull the thread, and trim it so that it looks smart.
Conclusion
Leather is not the easiest material to sew with and some people will say why bother? Why not go and just buy your leather garment or whatever else you want. However, a challenge is always worthwhile and once you have sewn a couple of leather items, you will be more proficient. Just remember to make sure that the pieces of material are securely joined before you start sewing and that the saddle stitch is the one used as it is strong and will stop your item from falling apart. Once you have mastered these techniques, you will be able to think about sewing yourself a leather jacket or purse. All it needs is time and patience.
