
Who doesn’t love pockets? Aside from being functional, they can add interest and pop of color to any clothing. Plus, they have always been a favorite in fashion. So today, we will teach you how to sew a pocket, as well as make a pocket of any shape to give your garments extra style and functionality.
Pockets are very easy to make and can make your life so much easier. After all, haven’t you ever thought about how much better your favorite party dress would be if it had pockets? You can stick your lip gloss in it, your mobile phone, and more.
Table of Contents
Instructions On How To Sew A Pocket
Starting with creating a pattern, there are 7 steps to follow o how to make a pocket. You can use these pockets for your clothes, bags, and just about anything imaginable.
Step 1: Make The Pattern
Decide on the size and shape of the pocket you want and draw it on a piece of paper. The simplest way to make it symmetrical is to fold a piece of paper in half and draw one side of the pocket.
Step 2: Add A Seam Allowance
Most people like to add 1/4 inch seam allowances to their DIY pockets. Adding a smaller seam allowance enables you to get enough accuracy when sewing curves. For a square pocket, you can add about 3/8 inch or 1 cm.
Cut around the line of your seam allowance line to create your very own custom-made pattern. You can use simple photo editing software or even Microsoft Word to print various sizes and shapes.
Some of the shapes you may consider include a traditional curved pocket, tulip shape, or even a heart. The heart shape pocket with cute prints is an excellent idea if you’re making clothing for little girls favorites for little girls clothing.
Step 3: Cut Your Fabric
Cut 2 pieces of fabric from your pattern piece. The best fabrics to use are cotton or cotton blend because you’ll be able to get nice crisp corners. What’s more, they are easy to iron.
Avoid using clear or thick fabrics since you’ll have a hard time pressing them.
When using thin fabrics, the addition of a layer of fusible interfacing can help give your pocket some body and shape. Always interface the piece that will be the inside of your pocket so that any wrinkles caused by the interfacing are not visible on the outside.
Step 4: Draw The Stitching Line
You can achieve the best stitching accuracy when you draw in the stitching line of the pocket. This will provide you with a very nice finished shape, especially when you are making heart, tulip, and other fancy shapes. However, this is not as crucial when making square pockets.
Take your pattern piece (the paper pattern and not the fabric) and cut it back to your original stitching line. Then, flip one of your fabric pocket pieces to the wrong side and draw around the stitching line using chalk or a removable pen. Doing so can help you to stitch more accurately and get a nice shape at the end.
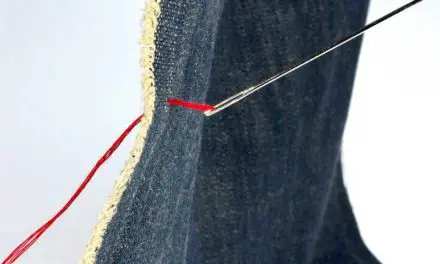
Step 5: Stitch Around
With the right sides together, stitch the pocket pieces all the way around leaving around 1 and 1/2 to 2 inches gap at the side or bottom. The bigger the pocket, the bigger the gap that you need to leave. Try and leave the gap somewhere straight.
Step 6: Clip
Clip the corners and curves of your custom-made pocket. If your pocket has a bigger seam allowance than 1/4 inch, trim it back and leave the gap untrimmed.
You may also use pinking shears to cut around the curves as an alternative to clipping those areas. But you still need to clip the top corners.
Step 7: Turn Right Way Out
Turn your pocket the right way out and press well. Ensure that all curves are poked out and they are smooth as well.
Step 8: Attach The Pocket
The final step on how to sew a pocket is to pin your pocket in place on the right side of your clothing item. Make sure that it is straight. Next, stitch around the sides and bottom using a topstitch that is close to the edge. This will give you the option of closing the gap in the bottom or side.
- Topstitching Threads. You can use a thicker topstitching thread instead of your regular thread. If you’re a beginner sewer, it is advisable to match the color. But as you gain experience in sewing, you may consider changing it up to a more stylish color.
- Reinforcing. You must backstitch the start and the end of the stitching for additional strength. If you are putting your hands in and out of a pocket, it will get plenty of wear and tear.
If you plan to make this pocket for your purse or bag, you may want to add another kind of pocket to the inside. A zipper pocket is a good idea to keep keep your valuables safe. Also, you can make it to ensure your phone and keys fit nicely by simply varying the depth.
Pocket Decoration Ideas
Pockets don’t need to be plain. You can add a line of pompom braid into the seam to make your pocket stand out from the background fabric. Another excellent idea is to embellish them with beads, sequins, and even rhinestones. You can use them individually or work with some hand embroidery. Also, you may consider leaving the top open. The excess fabric folds over, which will leave you with a pop of color.
Final Words
That’s it! You now know how to sew a pocket. It’s not so hard after all, right? Now, you will be able to make almost all sorts of novelty pocket shape for your pieces of clothing. A little embellishment here and there allows you to incorporate your sewing project with a touch of your personality along with style.


