
Learning how to sew a blazer is generally deemed a fairly advanced project. Nevertheless, many of the necessary steps you’ll apply along the way are the basic sewing skill usually used in simple projects as well. Also, it is easier in comparison to making a traditional jacket.
With blazers, you have plenty of fabric choices. On top of that, you are not required to add a lining. Additionally, if you opt to go for a simple blazer pattern, the only thing you need to do is to sew around 8 pieces to make the body. And after you have attached the sleeves, you are all set to iron your new DIY blazer and wear it proudly and in style.
Table of Contents
Cutting Out the Fabric Pieces
Download or buy a pattern
A lot of patterns will tell you the level of the difficulty level of the project. So make sure to pick a blazer pattern based on your skill level. Remember that the silhouettes of beginner blazer patterns are simpler. Therefore, they are easier to assemble
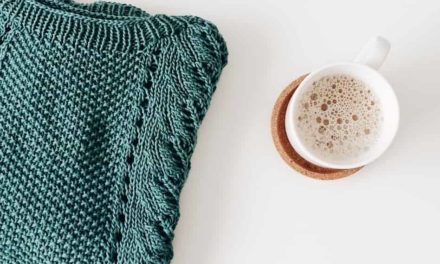
Choose a fabric for your blazer
Select linen or other lightweight fabrics if you’ll wear your blazer in warmer temperatures. Meanwhile, use a medium-weight fabric, like tweed, for cooler temperatures.
Cut the paper pattern pieces
Unfold your paper pattern and cut out the pieces based on the size of the blazer you are using. You’ll most likely have around 4 pieces for the front, 2 to 4 pieces for the back, and 2 pieces for the sleeves.
Each piece should be labeled, but if it isn’t, label each piece so you can keep track of how to assemble the blazer.
Cut out the fabric pieces for your blazer
Lay all the pattern pieces on your fabric and cut the fabric using the paper as a template. Your pattern piece should have a line printed on it that you’ll line up with the grain of your fabric. This ensures that your blazer will hang properly when you wear it
Sewing the Body of the Blazer
Lapel piece
Place both of your front panel pieces flat so the pattern faces up. Then, take the 2 lapel fabric pieces and lay them right side up on the panel pieces. Line up the straight edge of the lapels with the inner edge of the panel pieces. Then, insert sewing pins so they’re parallel with the inner edge of the pieces.
Straight stitch the inner panel
Take the fabric to your sewing machine and use thread that matches your fabric to begin sewing the lapel piece. Keep sewing straight along the inner edge and leave about 1/4 inch seam allowance. Then, set the fabric aside while you work on the back.
Back piece
Take the two large back pieces. Stack them so the right sides of the fabric are facing each other. Line up the edges so the shoulders, sides, and bottom are aligned. Then, pin the inner side from the neckline to the hemline.
Straight stitch the inner side of the back pieces
To make 1 large back panel, take your pinned fabric to the sewing machine. Sew straight stitches from the neckline down to the hemline. Leave around 1/4 seam allowance as you sew just like with the inner pannel.
Arrange the front pieces on the back piece
Spread out the back piece that you just finished sewing so the pattern is facing down. Then, lay both of the front panel pieces on top with the wrong sides facing up. Line up the outer edges of the panel pieces with the outer edges of the back piece.
Pin the edges of the front pieces to the back piece
Get out sewing pins and push them through the fabric around every two inches. Insert the pins so they’re parallel with the edges of the blazer pieces. Don’t pin the curve around each of the armholes since you won’t be sewing them.
Straight stitch along the shoulders and outer sides of the blazer
Leave a 1/4 inch seam allowance as you sew across the shoulder line. Then, straight stitch from the bottom of the armhole down to the bottom of the blazer. Repeat this for the other side.
Attaching the Sleeves
- Lay the undersleeve piece on the upper sleeve and pin them.
- You’ll have to stretch the undersleeve piece a little since the upper sleeve piece is longer.
- Line up the cuffs for both pieces so they’re even.
- Straight stitch from the cuff of one side up to the end of the undersleeve piece.
- Leave a 1/4 to 1/2 inch seam allowance, depending on your pattern. Then, sew the other side seam.
- Unfold the seams and iron them flat. Remember to set your iron to the right temperature for the fabric you’re working with.
- Flip the sleeve right side out and insert the wide end into the blazer’s armhole.
- Insert sewing pins on the inside of the sleeve, putting them about every 1 inch around the sleeve. Keep the pins on the wrong side of the fabric since this is where you’ll be sewing.
- Line up the center of the upper sleeve so it’s aligned with the shoulder line.
- Sew along the sleeve to connect it to the armhole and remember to sew the wrong side of the fabric. Leave about a 1/2 inch seam allowance as you sew.
- Repeat all the steps to attach the other sleeve to your blazer
Hemming the Blazer
- Iron the cuffs, lapels, and hemline. If you’re in a hurry, you could skip this step and just pin the fabric instead. Make sure to read the care instructions for the fabric you’re using so you know what setting to turn your iron.
- Hem the cuffs, lapels, and bottom of the blazer using a topstitch. Fold the fabric by 1/4 inch and then fold it over one more time o reach the crease you ironed. Then, topstitch along near the folded edge.
- Repeat this for each cuff, both lapels, and the bottom edge of the blazer.
- Attach buttons or snaps if you want to include embellishments.

