Most people want to master all the basics of sewing. However, they don’t feel that confident in tackling sewing a zipper. Therefore, it’s often the last thing on the list of their sewing skills. Your outlook will be different when you have a better understanding of zippers. And this tutorial on how to sew a zipper can help you.
Zippers are a very valuable addition to the world of sewing. With a little practice, combined with some helpful tips, you will be able to take on this method full of confidence.
Table of Contents
Different Types Of Zippers
The first thing you want to do is to know the different types of zippers, as well as the best techniques for sewing them.
- Coil Zippers. These are the most common type of zippers. Made of nylon, coil zippers are flat on one side and have teeth on the other. Each tooth is attached to the other to bind easily. Moreover, they are waterproof, heat resistant, and lightweight. These zippers work well on tote bags, purses, backpacks, and sleeping bags.
- Tooth Zippers. They are made of metal or plastic and have teeth visible on both sides and each tooth is separate. Tooth zippers are best for jackets and camping gear.
- Invisible Zippers. You usually hide these zippers in a seam with only the pull tab visible. They are flexible and strong, making them ideal for dressmaking and soft furnishings such as cushions.
- Open-Ended Zipper. This type of zipper is an excellent innovation for the opening and closing of jackets and other items to open out at the end. It comes with a slide mechanism that slips in before closing the zipper.
Interesting Facts About Zippers
- Zippers are very useful. They are a professional way to bring closure to many articles you make. You can use them to fasten all kinds of articles, including dresses, jackets, skirts, bags, sports gear, and so much more.
- The term zipper comes from the noise it makes when you zip it up.
- Zippers became popular during the 1930s. They were used as a way to encourage kids to be more independent in their dressing.
- Zippers are available in a wide range of lengths, widths, and colors. Some zipper tags bear their code number, which tells you the width of the chain mechanism. For instance, #3 means that the zipper is 3mm wide.
- The way to measure a zipper is from its stopper at the top to the retainer bar at the bottom. Simply put, that’s from metal to metal.
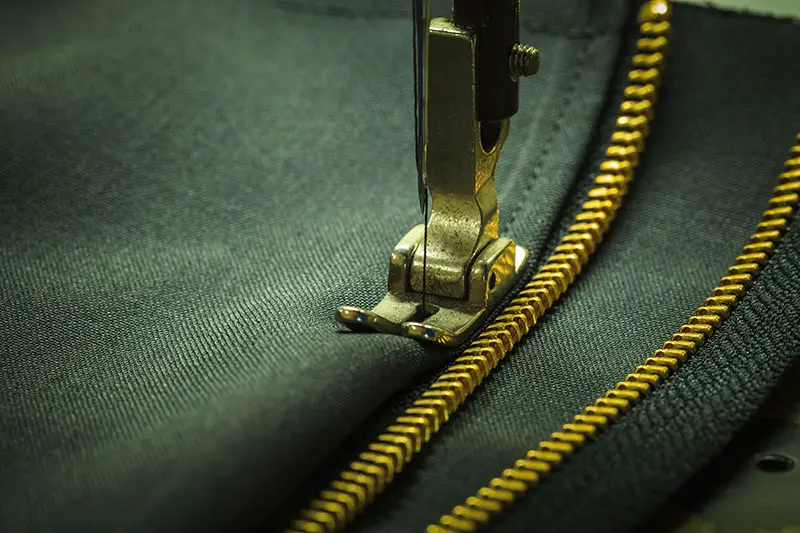
- To accurately sew a zipper, a zipper foot attachment is necessary.
- When learning how to sew a zipper, you’ll need to use different techniques. But the main method is often called the exposed zipper, the invisible zipper, or the railroad center zipper method.
How To Sew A Zipper: Center Seam
The central seam technique is the most popular when it comes to sewing a zipper. These are the basic instructions you need to follow when inserting this zipper.
Supplies you’ll need:
Here are the things you need to learn how to sew a zipper:
- Your zipper. If your zipper is the wrong length for your project then you need to shorten it.
- A zipper foot
- Sewer’s tape or even scotch tape will do.
Most sewing machines will come with a zipper foot, but if you have lost yours then consider purchasing a set of presser feet online or at a local store.
Step-By Step Instructions
Step 1: Finish Edges
Begin with finishing the edges of your fabric to be closed with a zipper.
Most sewers use a serger but if you only have a regular machine then a simple zig-zag will work nicely. If you do use a serger, make sure to careful that you don’t cut too much of the seam allowance off as it will make the edges too short to insert your zipper.
Step 2: Sew Edges
Sew the two pieces together with right sides together up to where you will insert the zipper. Use a regular length stitch and the seam allowance indicated in your pattern. Usually, this will be either 1/2 inch or 5/8 inch.
Afterward, backstitch the endpoints.
Step 3: Baste Gap
Use a long basting stitch with a length of 4.0 on the part that will be open for the zipper. You don’t have to bother backstitching the ends since you will unpick this later on.
Step 4: Press Open
Turn to the wrong side and press open the seam allowance.
Step 5: Place The Zipper
On the wrong side, place your zipper face down along the basted seam. Make sure to always begin at the top, aligning the top of the zipper with the top raw edge.
Step 6: Baste Zipper
Put a temporary tape across the back of your zipper intervals to hold it in place. You can use either sewer’s tape or scotch tape, which can do the trick. Most sewers prefer tape rather than using pins since your zippers will stay much flatter.
Ensure that the ends are taped as well so that they stay almost straight. Because of the bulk of the zipper head, they tend to always separate slightly. Placing your zipper head face down can help lessen the bulk when sewing over later.
Step 7: Pin The Retainer Bar
Turn your fabric over and put a pin across the end just after the metal retainer bar. This will give you a guide when sewing over so you don’t hit any metal with your needle.
Step 8: Stitch The Zipper In Place
Now it’s time to sew your zipper. Change to your zipper foot and check the settings of your needle so that it is on the correct side to sew in the zipper.
There are two recommended methods of stitching a zipper.
The first one is by starting on one side and stitching down the zipper to the bottom. Then turn it and stitch a couple of rows over each other to secure the end. Make the stitches the same width you need at the bottom before stitching up the other side to the top.
The second method is by stitching the bottom in place at the width you want and then stitching one side to the top. Make sure to lift the foot and cut the threads before stitching the other side. Remember that it is a good idea to practice on a scrap of fabric first until you find the style you like best.
Step 9: Open The Seam
The last step on how to sew a zipper is to use your seam ripper to open the seam to the required length to be able to open and close your zipper.
And now you’re done!
Final Words
Knowing how to sew a zipper is easy with this tutorial. Once you’ve learned it, you will get this true feeling of achievement.


