
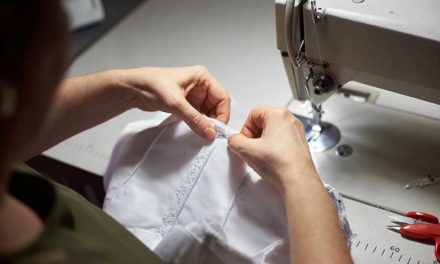
One of the most popular Christmas and birthday presents for your dad or your partner is a tie. However, they can be a little dull, but how about making a tie yourself? The effort will be appreciated and especially if you choose a favorite color or print of the fabric.
Ties are a little fiddly to make. You need the basic material, sew-in interfacing, and tipping lining for both ends of the tie. The tipping material can be the same color as the tie, but it can be fun to add a matching pattern or color. The underlining should be a little springy so that the tie doesn’t look stretched when it’s being worn.
Table of Contents
Get a Pattern
You will need a pattern to make the tie, but what is a good idea and very simple, is to just get an old tie and use it for the pattern. Use a seam ripper to take it apart. You should be left with two pieces of material from the tie, interfacing, and two lining tips, one from each end of the tie.
Put the pieces of the tie on a sheet of craft paper and draw around each one. Cut out the pattern pieces, making sure that the grainline is at a 45-degree angle across the weave. This is called the bias. Fabric cut on the bias is more elastic which will stop the tie from looking too rigid. With the tipping lining, measure the sides, bottom, and length to make sure that they will match the base pieces. You will be left with five pattern pieces.
Cut Out the Base Material and Tipping Lining
The first step is to cut out the base material. You will have two pieces, one for the front of the tie and the other for the back. Now is the time to make sure that the fabric is on the bias. You will need to measure from the grainline to the selvage. Selvage is the edges of the fabric and they need to be stitched to stop the tie from fraying. Once you have done all this, pin the material to the pattern and cut. The same thing needs to be done for the tipping lining. There has to be space for a seam allowance otherwise the tie will look ragged.
Join the Base Pieces
You will have two pieces of the base material and these will need to be sewn together. You will also have to sew the seam on both pieces
When sewing the two pieces together, you will have to make sure that the ends are the same length otherwise the back might fall beneath the front. Once you have done this sew the two pieces together. You will need a seam allowance here which should be between ¼ inch and ½ inch. Check the seam allowance on the original tie for guidance. This will mean that the tie will hang correctly when tied.
It is a good idea to press the seam when it is closed and then again when open. This will help to secure the tie in place.
Attach the Tipping Linings
The next step is to attach the tipping linings. Turn the base tie over to the wrong side and place one lining on one end and the other on the opposite end. Pin the linings in place and then stitch the tips closed and then the sides. You will need to have a ¼ inch seam allowance which will mean that the lining doesn’t drop below the base material. It is a good idea to then turn the tie over to the right side and press the linings in place. Use a warm iron, not hot as you don’t want to burn the material.
Add the Interlining
The final step is to attach the interlining into the middle of the wrong side of the tie. You will have ragged edges around the edge of the tie and now is the time to make the tie look perfect. Put the interlining in the center of the length of the tie. The end of the interlining should fit into the tips of the tie. Starting on one edge of the tie, turn and fold the side inwards for about ⅜ of an inch. Press it into place with a warm iron and then pin it into place Make sure that it is the same width all the way round otherwise, the tie will look crooked. Measure it at different points along with the seam allowance. When you have pinned one side, move over to the other and do the same.
The best option you have is to use the interlining from the old tie as it will fit perfectly and you won’t have to do any extra pattern cutting. The interlining isn’t seen so there is no problem doing this.
The best way to stitch the interlining is by hand. You will need to sew a bar tack with a whip stitch to secure the material first and then sew with a slip stitch. Once you have done this, sew a bar tack at each end to secure them. You will have to be careful doing this as you don’t want to sew through the base material otherwise you will be able to see the stitches.
Press the Tie
Pressing helps to secure the stitches, so this is the last step in making a tie. As we have said, use a warm iron, not hot, and don’t pull the fabric otherwise it might stretch.
Conclusion
If you want to make a tie for a child, it’s not that difficult. Just adjust the length. The same goes if you want to make a skinny tie. The length might be the same, but you will have to adjust the width. Whatever you decide to do, you will be guaranteed a great present for a loved one or a friend. They will be impressed that you have gone to the effort of making something so personalized.

